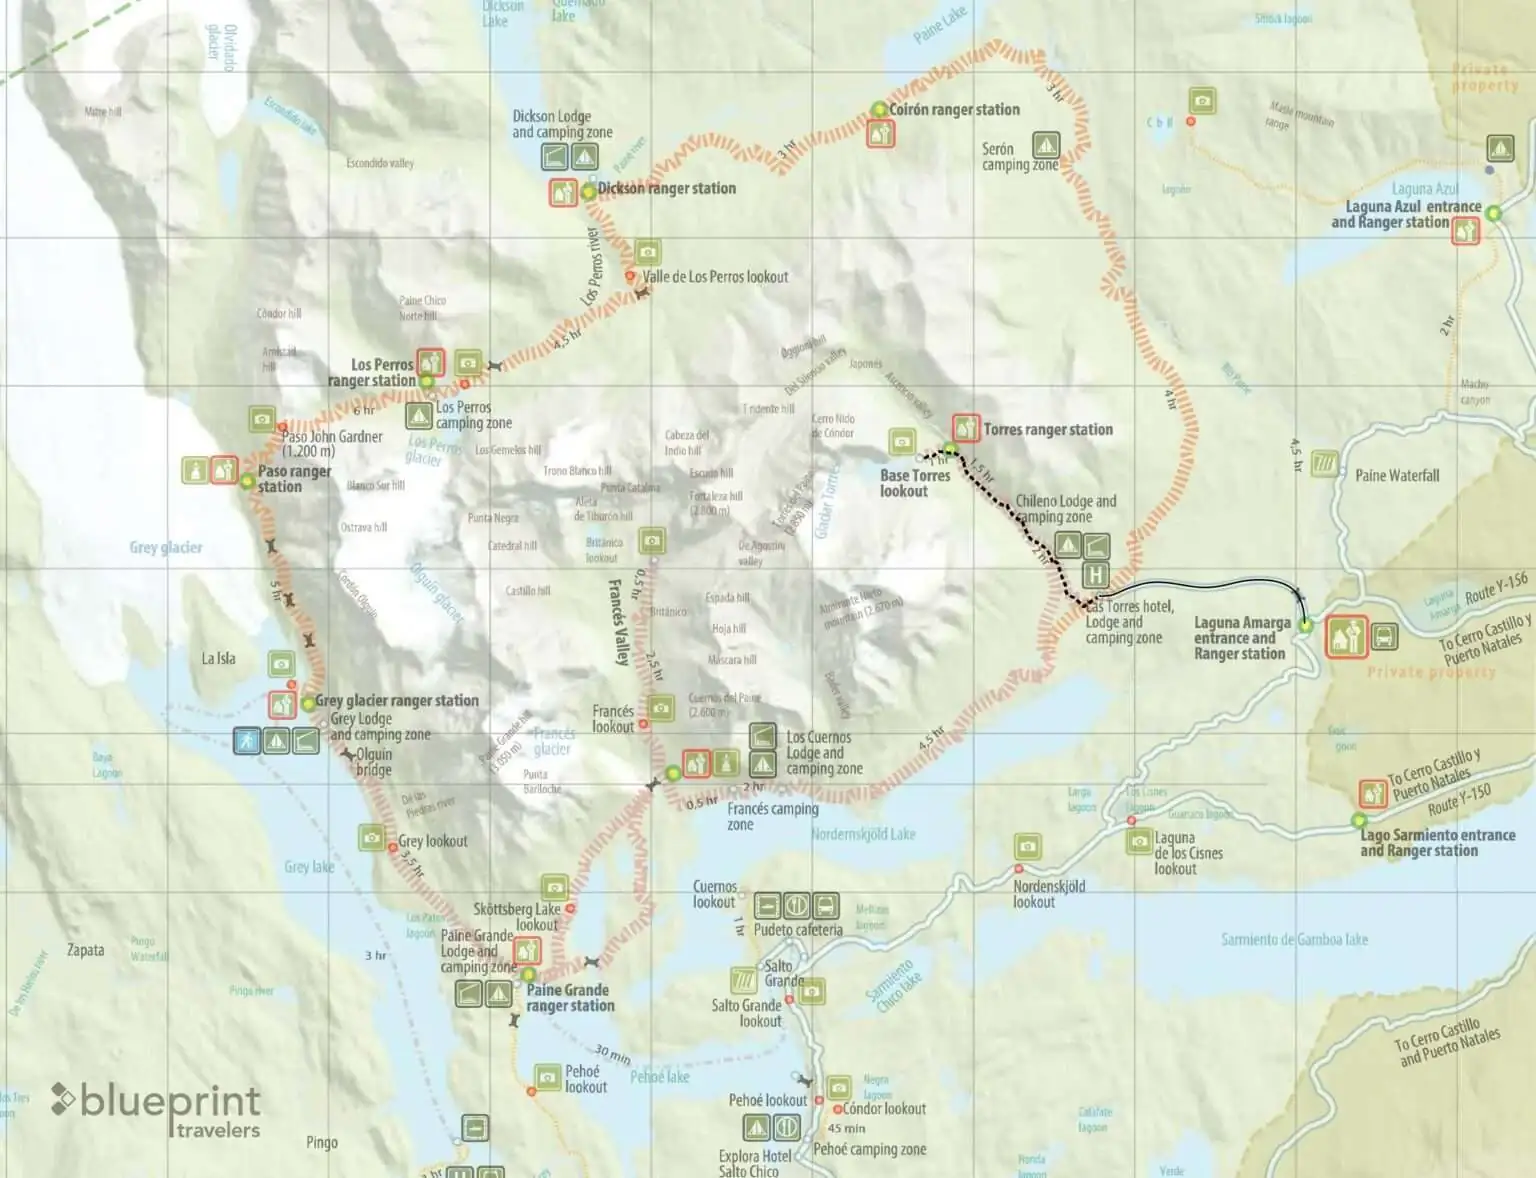
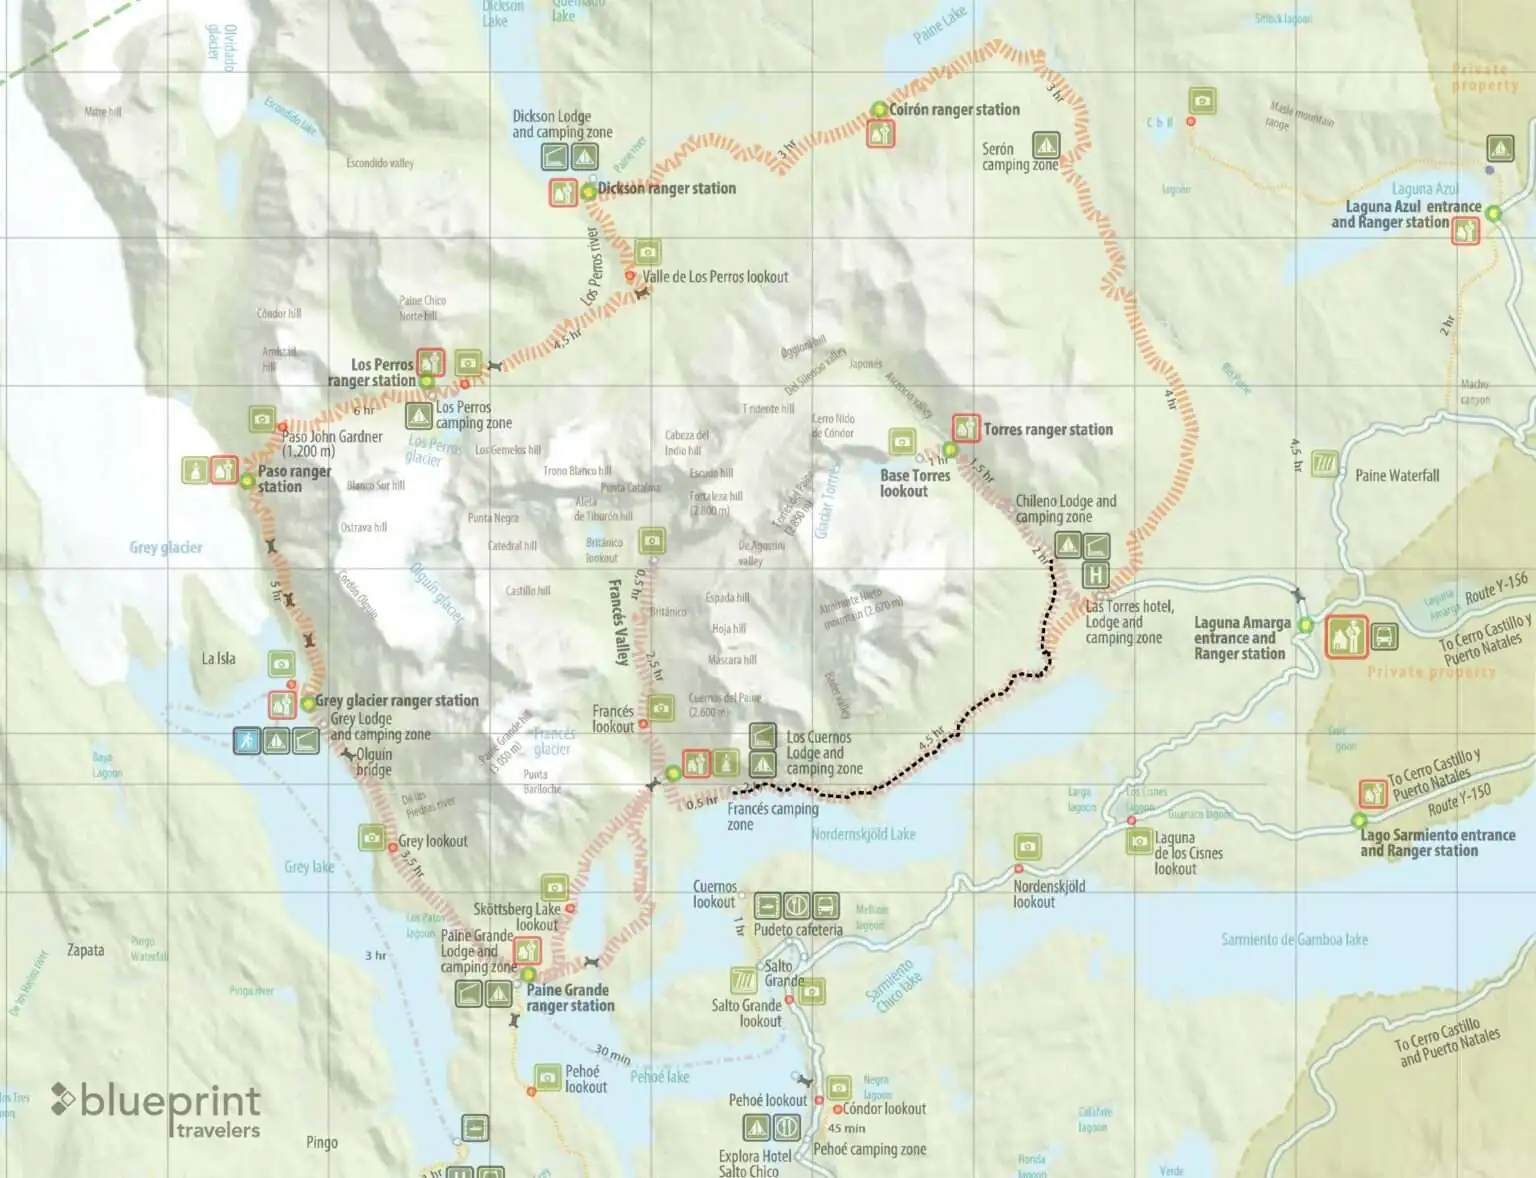
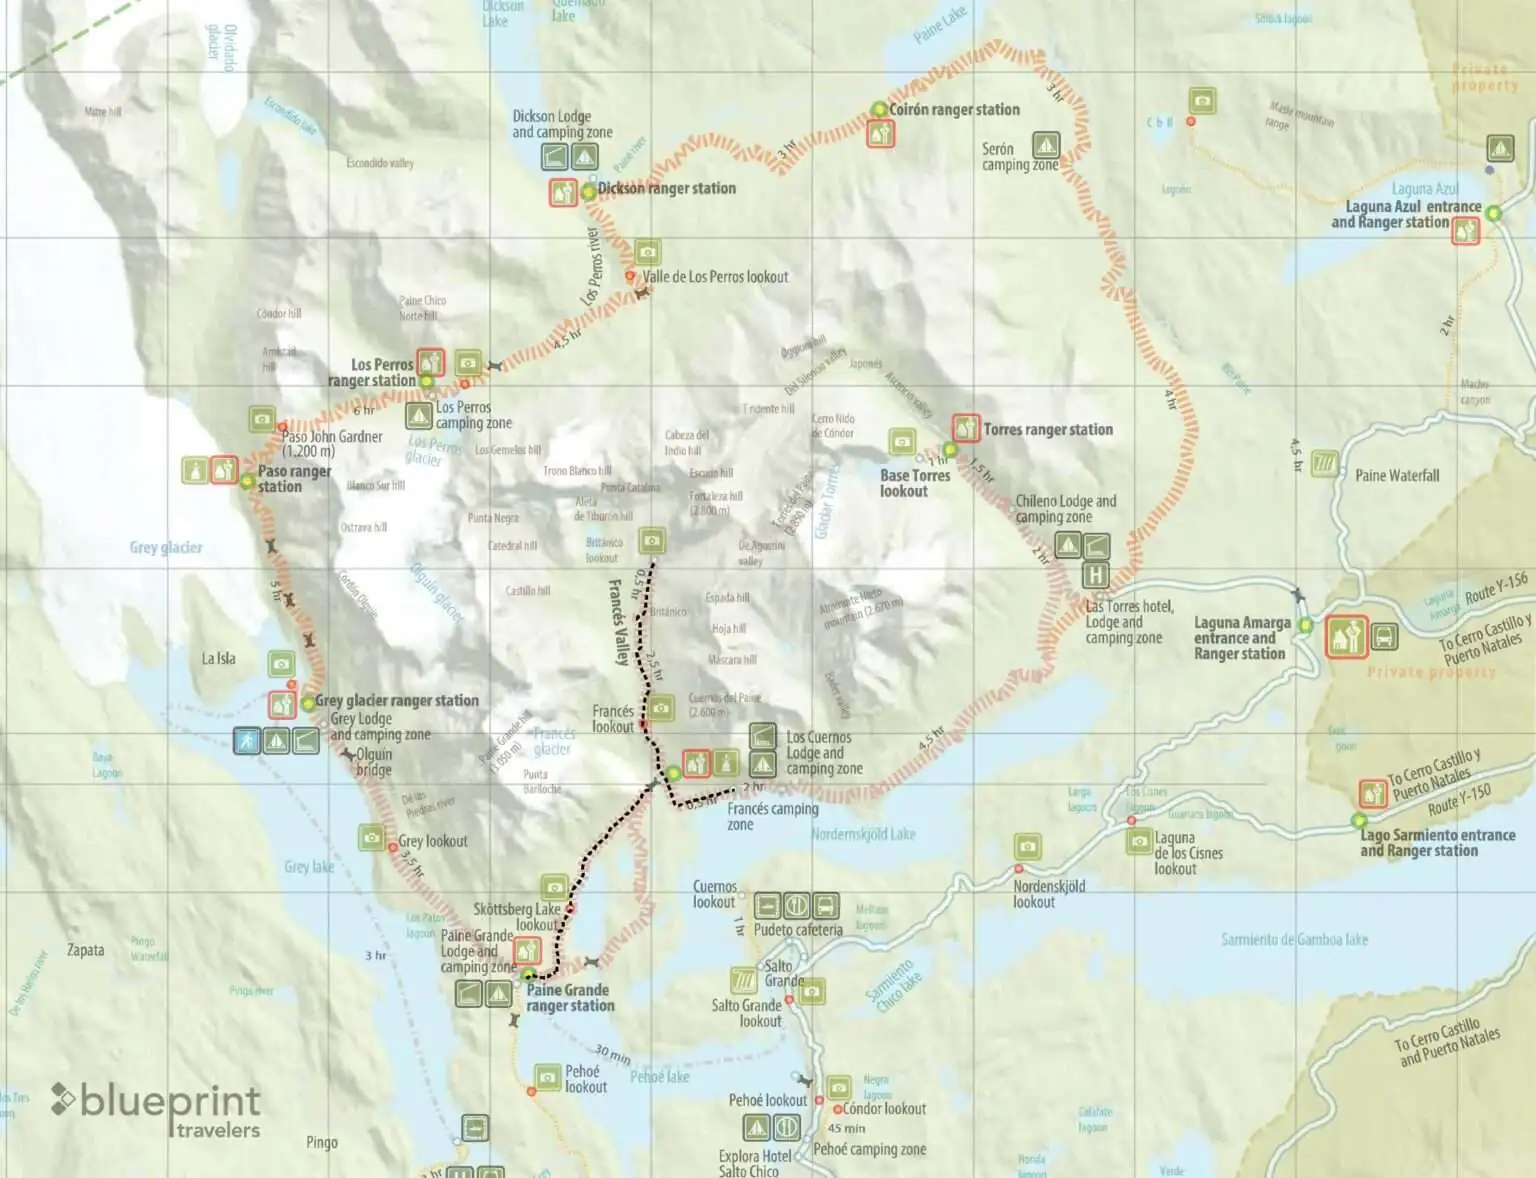
The following is a day by day break down of the Torres del Paine W Trek over 5 days. This description goes from East to West, starting from Laguna Amargo and ending in Pudeto. If you are planning your trip from West to East, you will do the reverse of what is described below.

Before Leaving for the Torres del Paine W Trek
Gear Rental and Baggage Storage

Gear Rental for the Torres del Paine W Trek
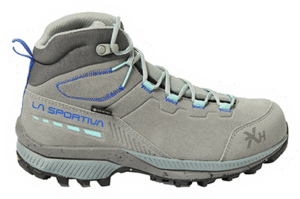
Traveling with a lot of hiking gear can be challenging. You may not want to purchase hiking gear if you are unsure about multi-day hikes in your future. Not to worry! The multi-day hikes of Torres del Paine are especially great for those who are not accustomed to this type of adventuring because the nearby town has shops specifically designed for visitors. If you do not have all the equipment needed for the hike (backpacks, trekking poles, a rain jacket, a sun hat), you can rent your gear directly in Puerto Natales from Rental Natales. With this company, you can reserve the gear in advance online and they have clothing that can be rented or purchased.
Luggage Storage for the Torres del Paine W Trek
If you are staying in a hotel or hostel before and after your trek, you will be able to store your luggage at those accommodations while you are doing the Torres del Paine W Trek or O Trek. And if you are staying in an Airbnb before and after, you can talk to a local hotel to store your items.
The following are the additional things that you will need to have prepared for your trek:
The National Park Pass
If you are doing a trek for more than 3 days, make sure to purchase the appropriate pass. As a tourist, you are an “extranjero”.
Bus from Puerto Natales to the Park
Book this in advance to get one of the earliest buses possible (7 am). If you are starting from the East, you will book a ticket from Puerto Natales (Terminal Rodoviario) to Laguna Amarga (park entrance) and get off the bus at the park entrance. From there, you will transfer to a shuttle. If you are starting from the West, you will book a ticket from Puerto Natales (Terminal Rodoviario) to Pudeto. You will get off the bus at the park entrance to check in and get back on the bus towards Pudeto, where you will take the catamaran.
Bus from the Park Back to Puerto Natales
If you are ending on the west side of the park, your bus will be from Pudeto to Puerto Natales (Terminal Rodoviario). If you are ending on the east side of the park, your bus will be from Laguna Amarga (park entrance) to Puerto Natales (Terminal Rodoviario).
Cash for the Shuttle in the Park
If you are starting on the East, you will take the shuttle after checking in at the park entrance. If you are starting from the West, you will take the shuttle after you arrive at the Welcome Center at the end of the hike. In 2024 the shuttle cost 4.000 Chilean pesos per person.
Tickets for the Catamaran
If you are starting or ending in Paine Grande, you will need to take the catamaran between Pudeto and Paine Grande. For those starting from the East, this will be at the end of your trek. If you are starting from the West, this will be at the beginning of your trek. The title of this paragraph includes the website with the itinerary and cost of the catamaran. You can also purchase your ticket for the catamaran in advance to line up with your bus reservation.
Downloads of all of your campsite reservations
Your passport
Your PDI document (receipt-like paper that is given when you enter Chile)
A Sample Packing List
5 shirts (One of us brought 2 long sleeves and 3 short sleeves. The other brought 4 short sleeves and 1 long sleeve. This is truly up to you and the weather)
1 pair of lounge pants for after hiking
1 pair of hiking pants
6 pairs of underwear
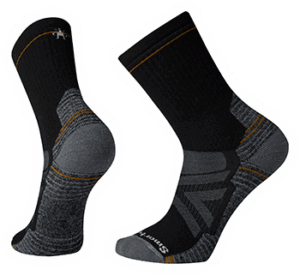
4-6 pairs of socks
Women: 2 sports bras
raincoat
fleece/puffer (warmer outer layer)
beanie
sunhat
buff
pair of sunglasses
bug spray
sunscreen
deodorant
toothbrush/toothpaste
comb/brush
soap/shampoo/conditioner
optional: contact lenses (anything you might need for that)
optional: glasses and case
kindle
outlet adapter
phone cord
portable charger
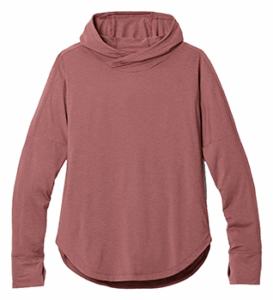
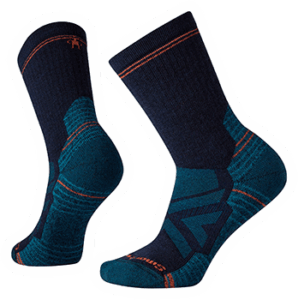
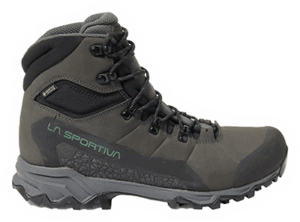
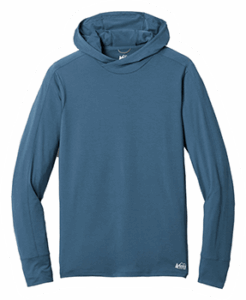
The Blueprint Travelers Hiking Staples
Torres Del Paine W Trek: Day 1
Getting to the Trailhead
We recommend taking the first busses (6:45 AM or 7:00 AM) from Puerto Natales to Laguna Amargo to get to the park as soon as possible. This will not only give you the most amount of time throughout the day to complete your first hike; it also allows you to avoid some of the larger crowds that will be doing the most popular day hikes in the park.

At the Laguna Amargo entrance around 8:45 AM everyone will get off the bus to check in at the ranger station. They will check your National Park Pass for your full time trekking in the park. Those who are continuing onto Pudeto (to do the Torres del Paine W Trek from west to east) will get back onto the original bus. However, those who are doing the trek from east to west (starting with the Towers hike) will most likely take the shuttles parked here.
Shuttle to the Welcome Center
It is possible to walk between the ranger station and the Welcome Center, but there is also a shuttle that can take you there for 4.000 Chilean pesos in cash (January 2024). Because of the quantity that you will be hiking on the first day and the rest of your time doing the Torres del Paine W Trek, you may want to consider taking the shuttle. Walk quickly to the shuttle to be some of the first in line for the shuttles, pay the driver and make sure you are on one of the first shuttles to the Welcome Center.
At the Welcome Center, you can fill up your water bottles at the bathrooms. All water in the park is potable and even streams have potable water (although we stuck to the designated re-fill areas), so you do not have to worry about transporting large quantities of water.
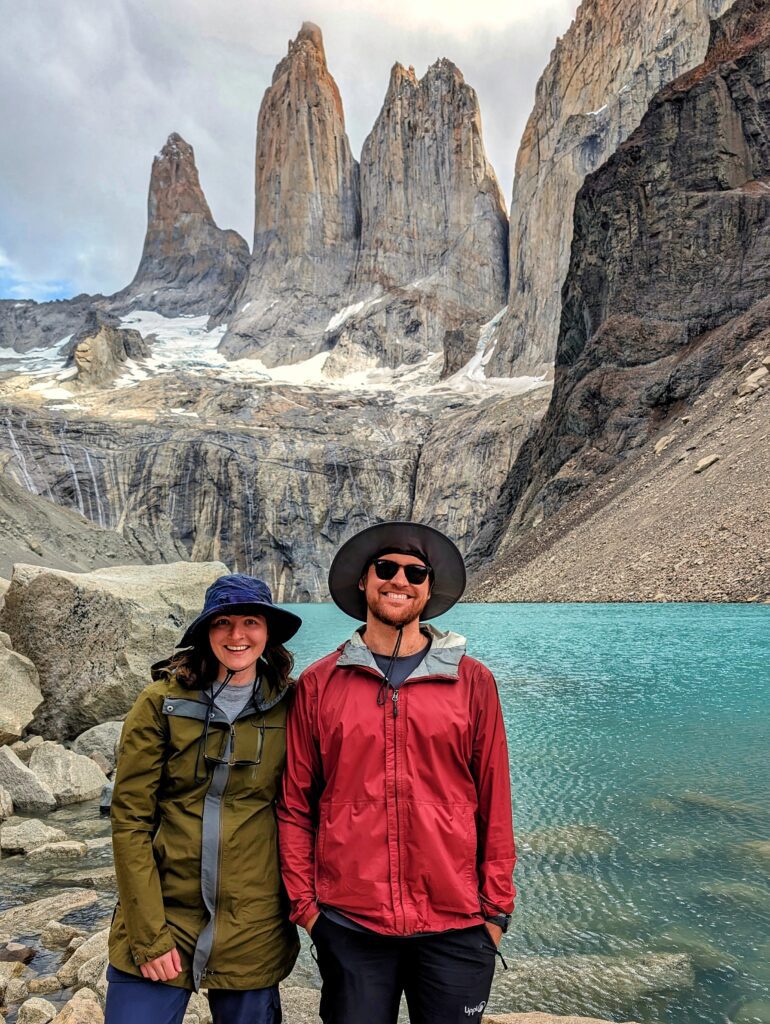
Hiking to the Towers
Distance:
9.2 miles (14.8 kilometers)
Elev. Gain
3,316 ft (956 m)
Time:
5 hours, 30 minutes
This link is for the full day hike to go from the base of the mountain up to the viewpoint and back.
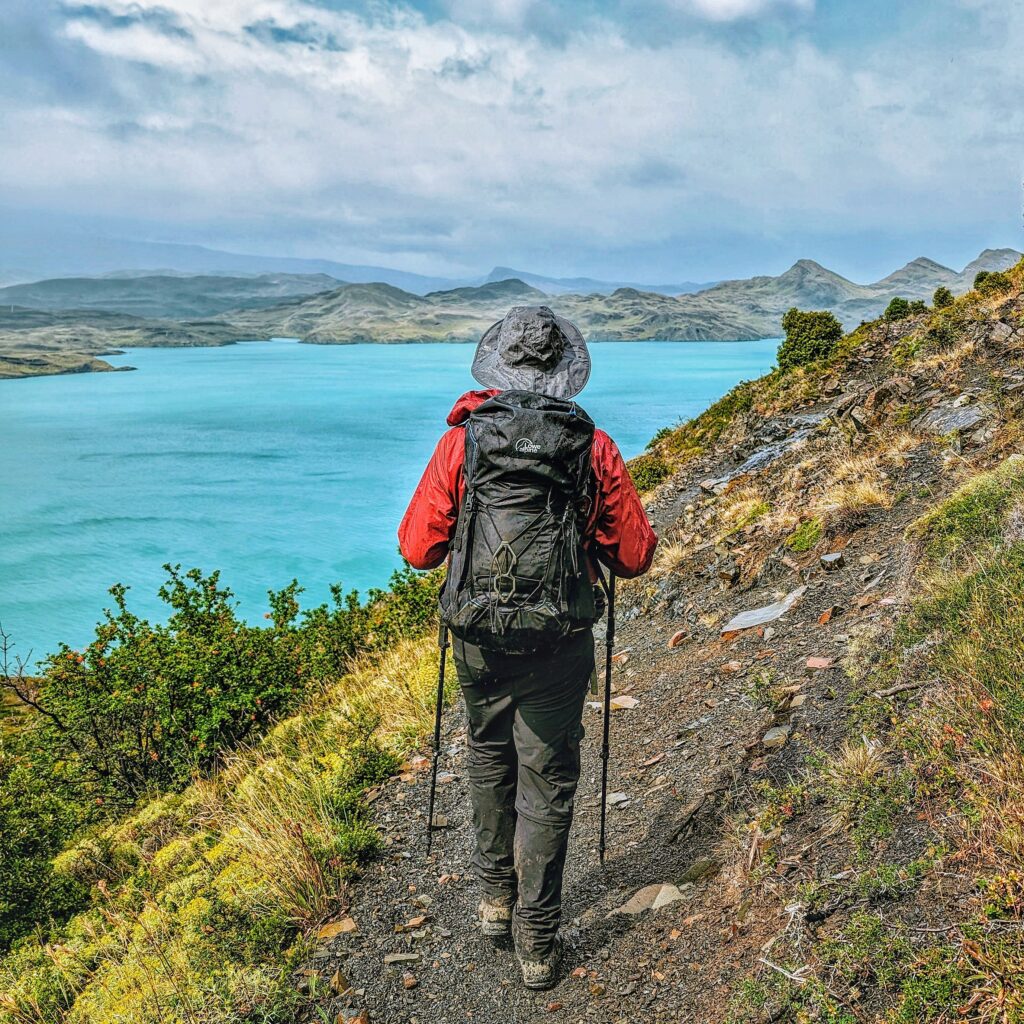
The goal of this first hike of the Torres del Paine W Trek is to reach the iconic Torres del Paine viewpoint. We recommend starting the hike around 9:00 AM, to Refugio Chileno. This portion of the hike is challenging, especially if it is your first time hiking with a backpack.
If you are following the recommended Blueprint Travelers guide, Refugio Chileno is where you will want to stay the night so you can drop off your larger bags at the refugio in a covered area and pack up a day bag to complete the hike. If you are staying further down in Torres Central, you should drop off your large backpack there prior to hiking up to the Refugio Chileno to make the day hike as easy as possible.
At Refugio Chileno, you can stop to eat some lunch. You can either pack a lunch from Puerto Natales or purchase food from the refugio when you get there. If you purchase the full board meal service, the service does not start until dinner that night. All refugios have vegetarian and gluten-free options available.
Getting to the Peak of the Hike
After lunch, fill up your water bottle right outside of the refugio from the potable water source and start on the next portion of the hike to the Base Torres lookout. It could take up to 2 hours to reach the peak of the hike, with the last 45 minutes being the most challenging so keep this in mind when planning your hike. Going up this portion of the trail closes at 3:00 PM and the lookout closes at 4:00 PM. This is a major reason to take an early bus to start the hike overall so you can maximize your time throughout the day to eat lunch and take in the views at the lookout.
It could take another 2 hours to return to Refugio Chileno, depending on your comfort with hiking down these boulders and the weather. When you get to the refugio, either Chileno or Torres Central, you will check-in and get access to your accommodations for the night along with the information regarding dinner and picking up packed lunches the next day if you have chosen the full meal plan option.
The Experience at Refugio Chileno
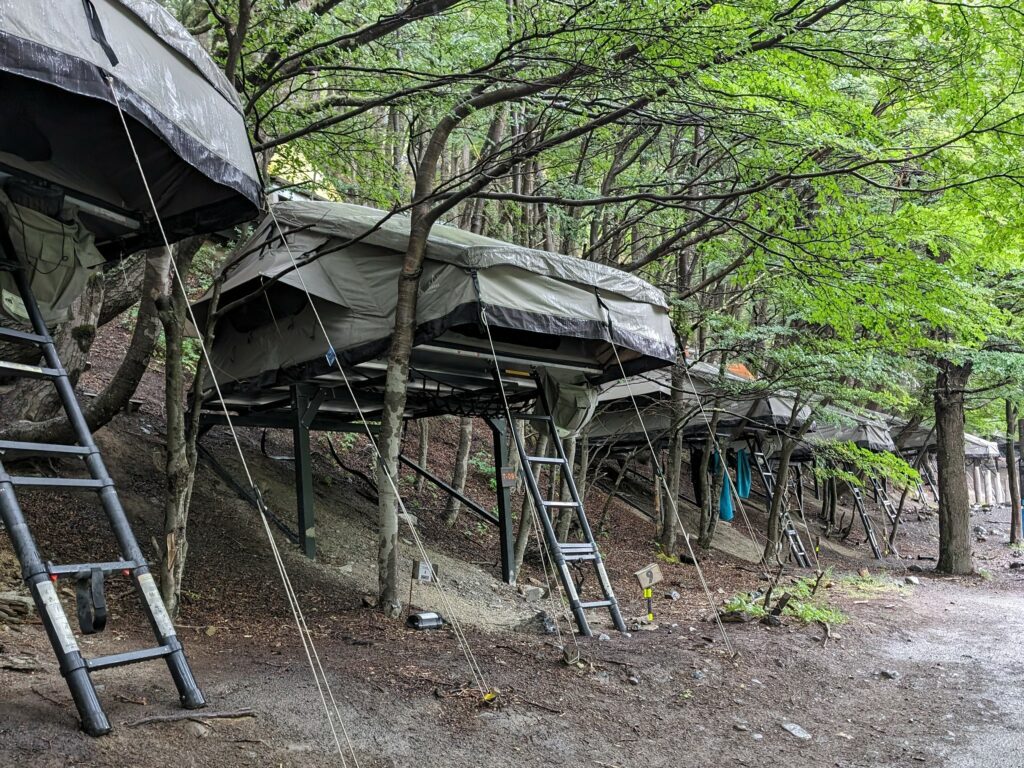
Refugio Chileno has bunk rooms, luxury tents, and camping site options. The luxury tent, as seen below, includes a tent, mattress pad covering the whole floor of the tent, and sleeping bags. At check-in, you are given information regarding your tent location, time for dinner and breakfast, and restroom and shower locations. After checking-in and putting your bags into your tent, you can take advantage of the shared showers and restrooms to freshen up prior to dinner. The hot water in the showers have limited hours so make sure to use them within those hours. You will need to provide your own shampoo, conditioner, soap, towel, and sandals.
Dinner, as included in the meal package, is very comprehensive and filling. One example of a meal incudes a vegetable soup, a protein with carbs and side vegetables for the main, and a small dessert. If you have dietary restrictions, you can let them know at check-in. You can also purchase drinks (alcoholic and non-alcoholic) in the dining area and there is always potable water available right outside of the refugio.
For people who are cooking their own food, you can only cook within a designated area in the refugio to protect the environment from forest fires (especially since one started in this way a few years ago).
Charging Your Devices
After dinner, most people quickly go to bed to be able to have an early start the next day and to get into the tent before the sun fully sets. The refugio has some outlets within the lodge where you can charge your devices during dinner. Most other travelers have adapters with multiple USB ports, allowing more people to charge their devices than outlets available. If you do not want to deal with the shared outlets, consider bringing a large portable charger to help charge up your phone. You should also keep your phone on airplane mode and with a minimal screen brightness to help maintain the battery life.
Torres Del Paine W Trek: Day 2
Breakfast at the refugio is between 7:00 AM and 9:00 AM. You may want to get there as soon as it opens to be able to get on the trail early for the second day of the Torres del Paine W Trek. Breakfast typically includes toast, eggs, ham, cheese, cereal, coffee, and juice. After breakfast, pack up your backpacks, pick up your packed lunch from the refugio if it is included in your dining package, refill your water bottle, and start hiking.
Refugio Chileno to Refugio Frances
Distance:
10 miles (16.1 kilometers)
Elev. Gain
1,591 ft (485 m)
Time:
6 hours
The route between Refugio Chileno to Refugio Frances
This link is for the route in the reverse direction of what is described here.
This straight-forward hike takes you along Nordernskjöld Lake, through the Cuernos Refugio, to Refugio Frances. (We recommend staying at Refugio Frances over the Cuernos Refugio because it will make the distance for the hike of day 3 shorter. It is one of the more challenging hikes of the Torres del Paine W Trek.
The Day 2 Hike
For this Day 2 hike, the trek will start at a higher elevation than where it ends, but the rolling hills still made it challenging. You may also have to deal with the ever-changing weather that persists in this part of Patagonia.
Before Refugio Frances, you will make your way to Refugio Cuernos, a great spot to eat lunch, but make sure to snack along the way to keep yourself fueled for the hike. The packed lunches in the all-inclusive dining package include a sandwich (either meat or veggie), a fruit, dried fruit, mixed nuts, and chocolate. Consider eating the snacks throughout the full trek.

After eating lunch, you can refill your water bottle at the refugio and continue on your hike towards Refugio Frances. At this location, we were staying in the hostel instead of the campsite. The check-in for the campsite (both premium camping and individual camping) is up the hill where as the one for the refugio is at the base of the hill.
The Experience at Refugio Frances
Refugio Frances has bunk rooms, luxury tents, and camping site options. It is important to note that the check in for both camping options is up the hill where as the one for the bunk rooms at the refugio is at the base of the hill. Similarly to the other refugios, you will check in, receive your allocated time for dinner and breakfast, and be given your lodge assignment. The sooner you arrive at the refugio, the earlier dining time you will receive (for both dinner and breakfast which will determine the time at which you will start your hike for the Torres del Paine W Trek the following day.) However, if you are visiting in the summer that daylight hours are long so you will not need to rush and will be able to enjoy at your own speed.
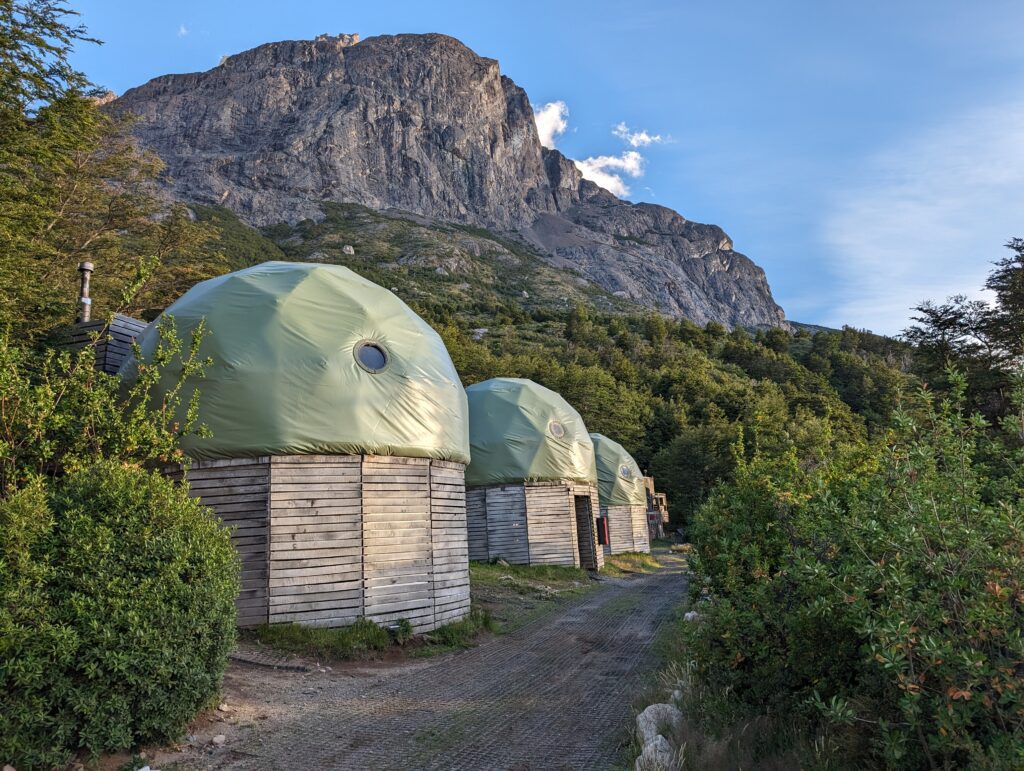
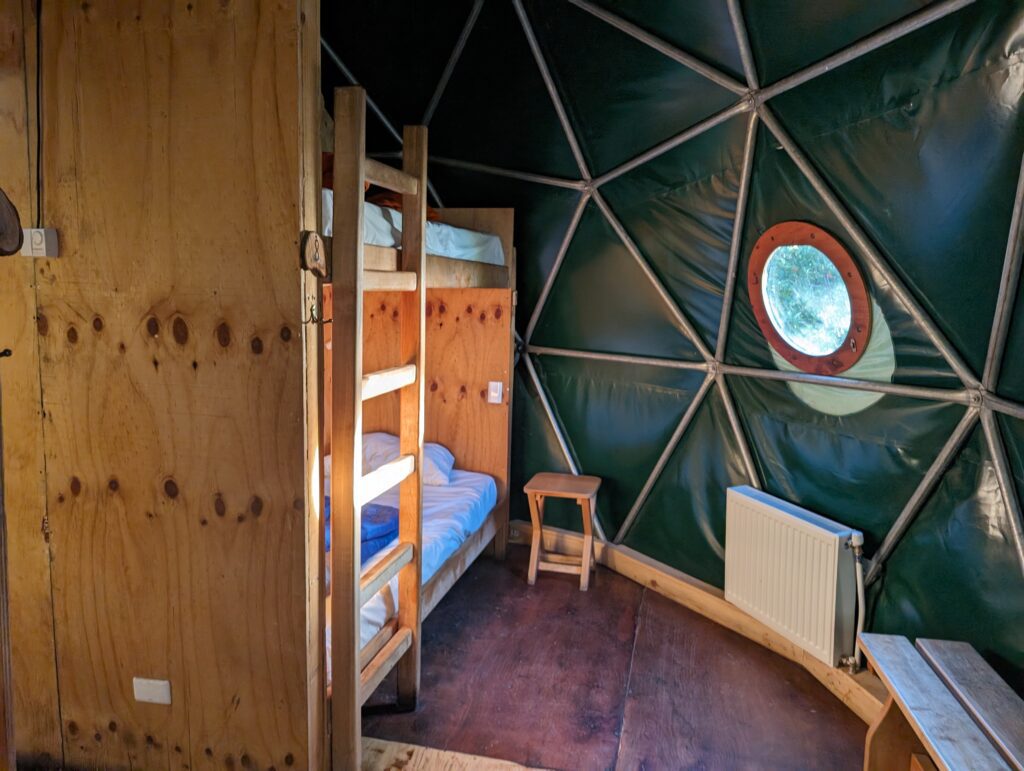
The luxury tents are the same as the ones at Refugio Chileno but the refugio itself is quite unique. At this refugio, 8 people are assigned to each dome, sleeping in 4 separate bunk beds. Each bunk has its own outlet, allowing you to charge your devices throughout the night. Each dome includes restrooms and showers. While the domes nicely separate the different groups of people, creating a sense of privacy, the structures themselves are quite loud and shaky with the wind. In addition, with the radiators on all night, they can get quite warm, especially in the top bunk. We would recommend opening all the windows in the dome and the bathroom area to help keep the temperature level throughout the night. If you sleep hot, consider sleeping on the bottom bunk or reserving a tent instead.
Similarly to the meal at the Refugio Chileno, dinner typically includes a vegetable soup, a protein with carbs and side vegetables for the main, and a small dessert. If you have dietary restrictions, you will let them know at check-in. You can purchase drinks (alcoholic and non-alcoholic) in the dining area. If you are staying in the camping area but are dining as part of the all-inclusive package, you will have to hike down the hill to the refugio for the meals.
For people who are cooking their own food, there is a designated structure within the camping area to do this.
Torres Del Paine W Trek: Day 3
Breakfast at this refugio is at an assigned time. Similarly to the previous refugio, it typically includes toast, eggs, ham, cheese, cereal, coffee, and juice. Before leaving, you can pick up your packed lunch.
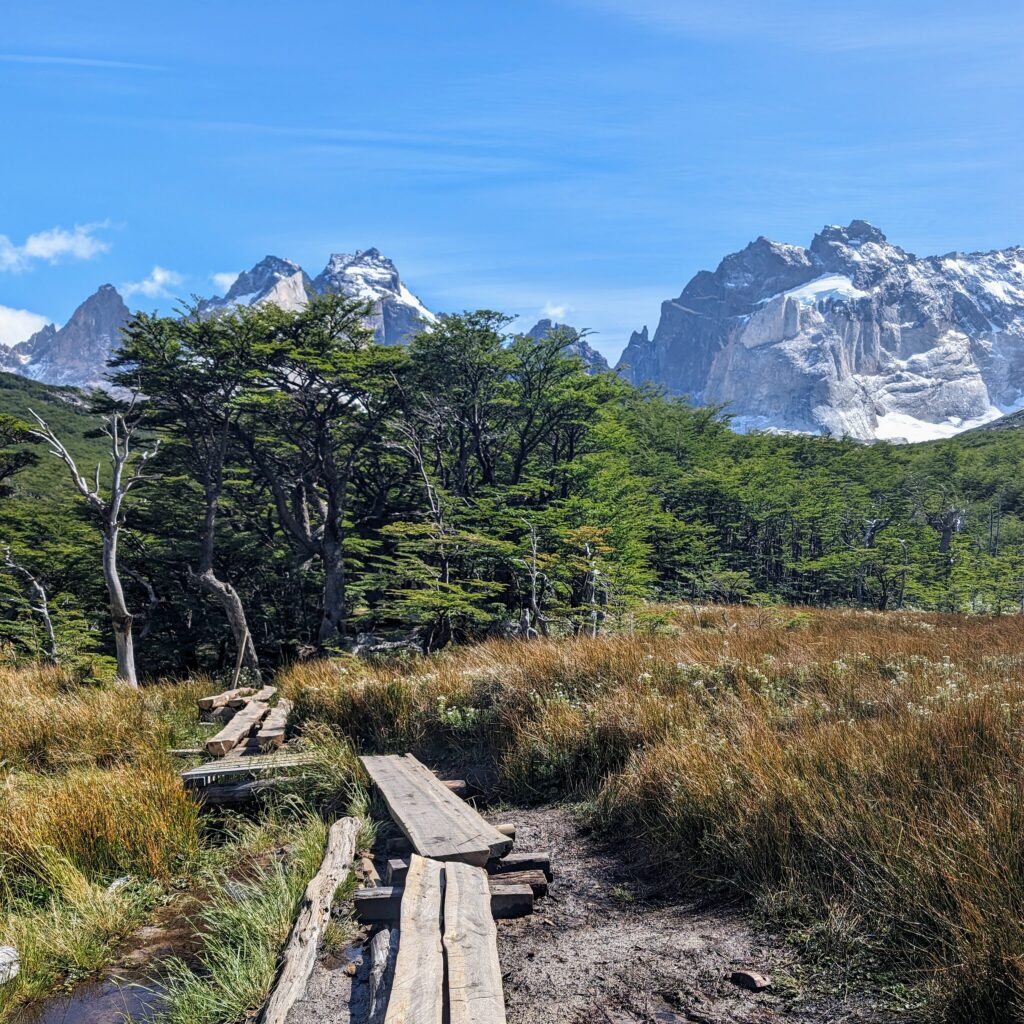
The day 3 hike has two incredible viewpoints so hopefully, you will have amazing weather on this day to be able to visit both of them.
Refugio Frances to Refugio Paine Grande through Mirador Frances and Mirador Britanico
Distance:
12.7 miles (20.4 kilometers)
Elev. Gain
2,966 ft (904 m)
Time:
7 hours
This link is for the route in the reverse direction of what is described here.
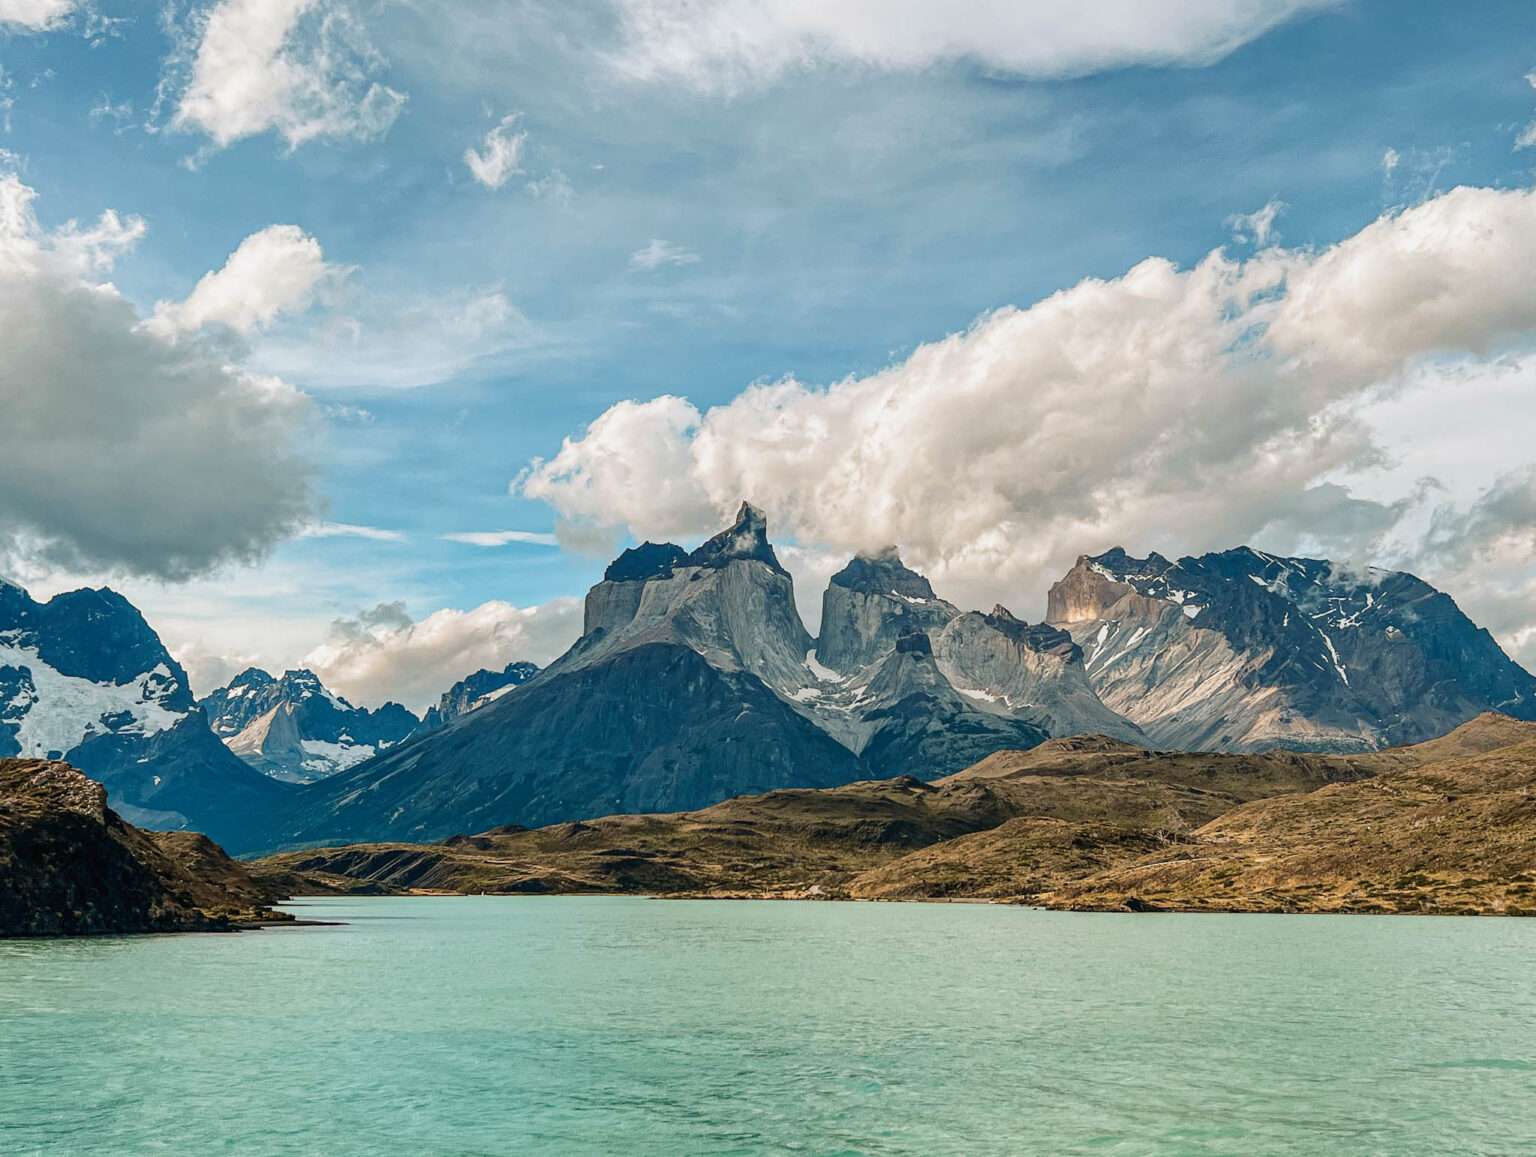
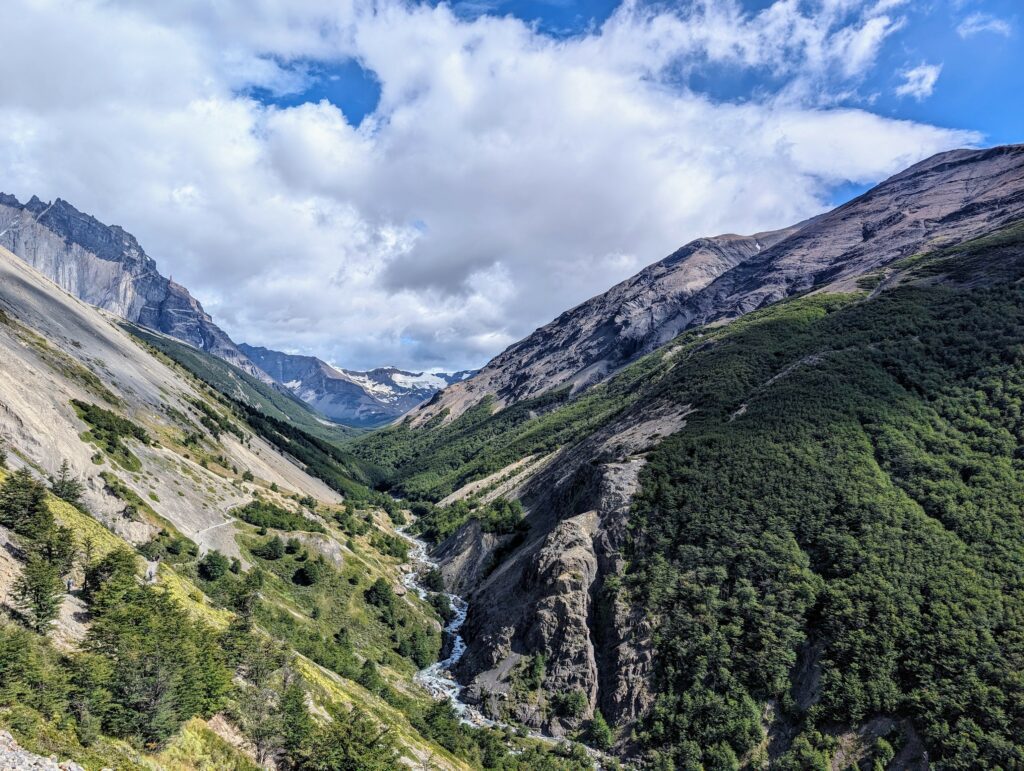
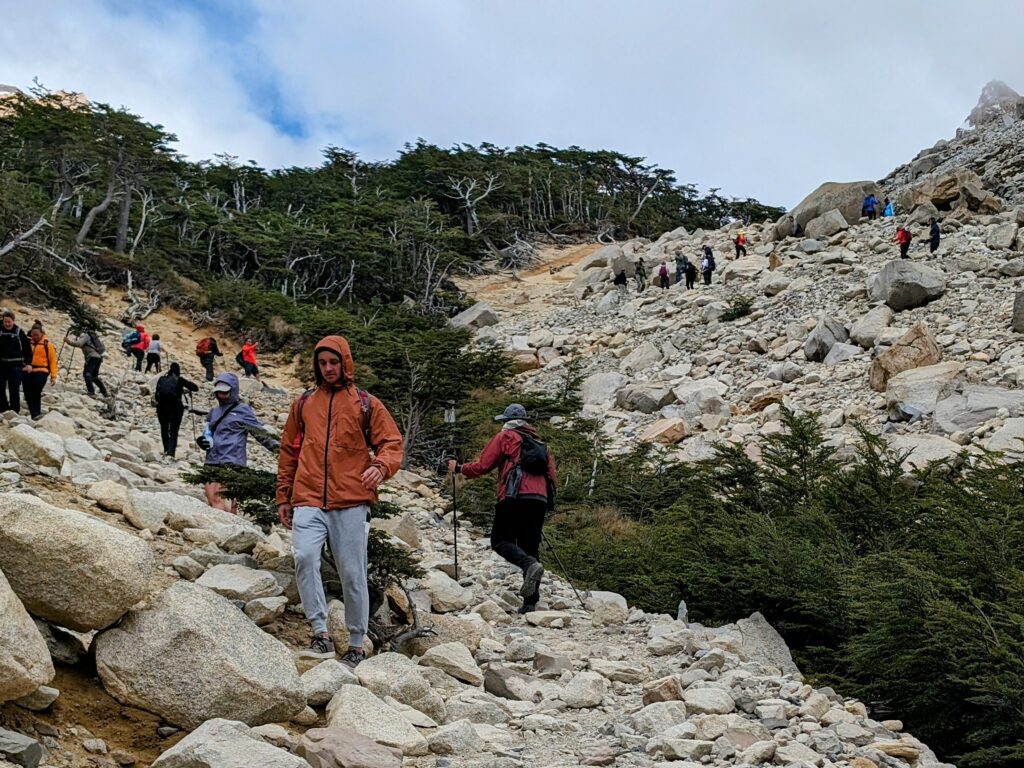
This long hike is one of the hardest but the most rewarding with incredible views throughout the day. As you leave the Refugio Frances, you will quickly arrive at the Italiano campsite, now a closed campsite at the base of the hike that you are about to ascend. Here, you can leave your backpacks, in a communal area along with everyone else. So pack up snacks, food, water, cold weather gear (just in case) in your day pack so you can make your way through the valley to the viewpoints.
The First Viewpoint
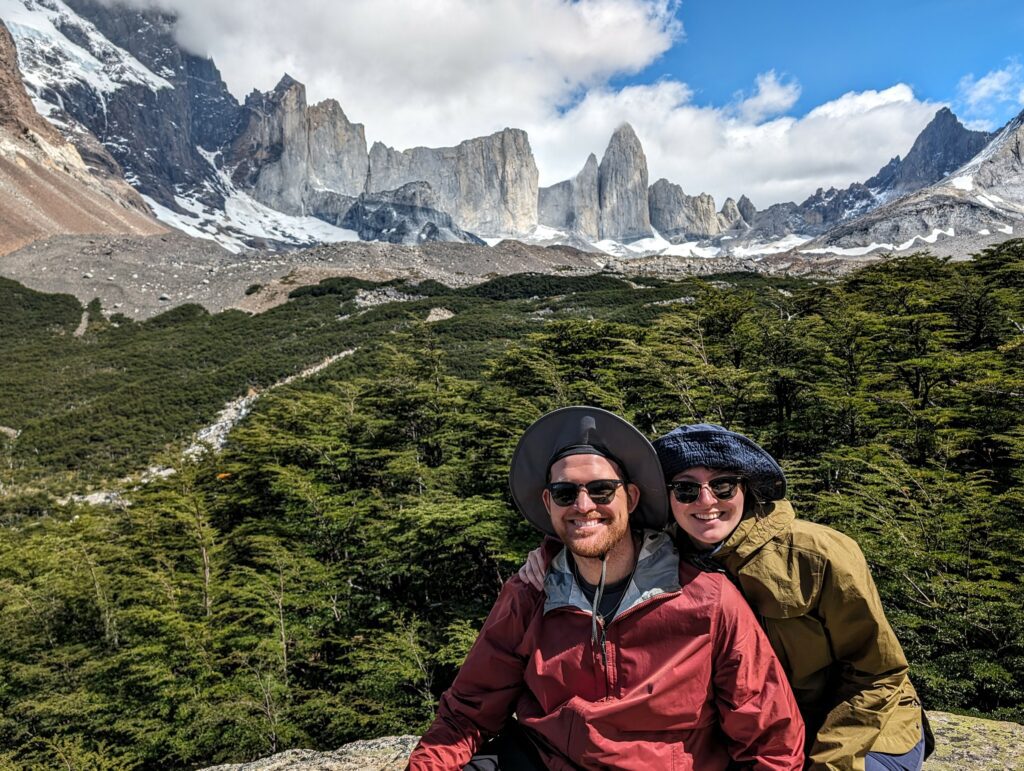
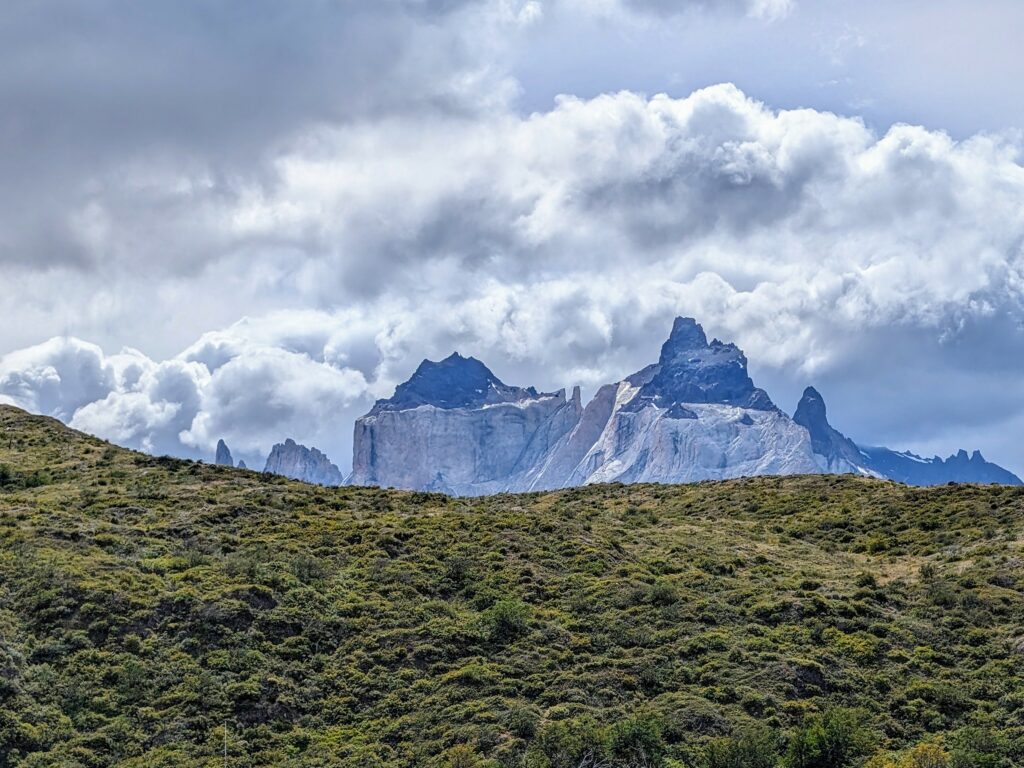
The first viewpoint is Mirador Frances, where you can see the Frances glacier on the left. This viewpoint will take your breath away! If the mountains ahead of this viewpoint are not visible, there is little reason to continue on this trek to the Mirador Britanico because the ultimate viewpoint would not be visible. However, if you can see the mountains, it is worth continuing on to the Mirador Britanico. The very end of this portion of the trek is a scramble up for the final 15-30 minutes.

The Last Viewpoint
From the Mirador Britanico, you have the opportunity to see mountains all around you, including the Torres del Paine to the east. Make your way back down through Mirador Frances to the Italiano campsite where you can eat some lunch. The round trip from the Italiano campsite to the Mirador Britanico and back could take around 4.5 hours, not including the time you will spend at the viewpoints.
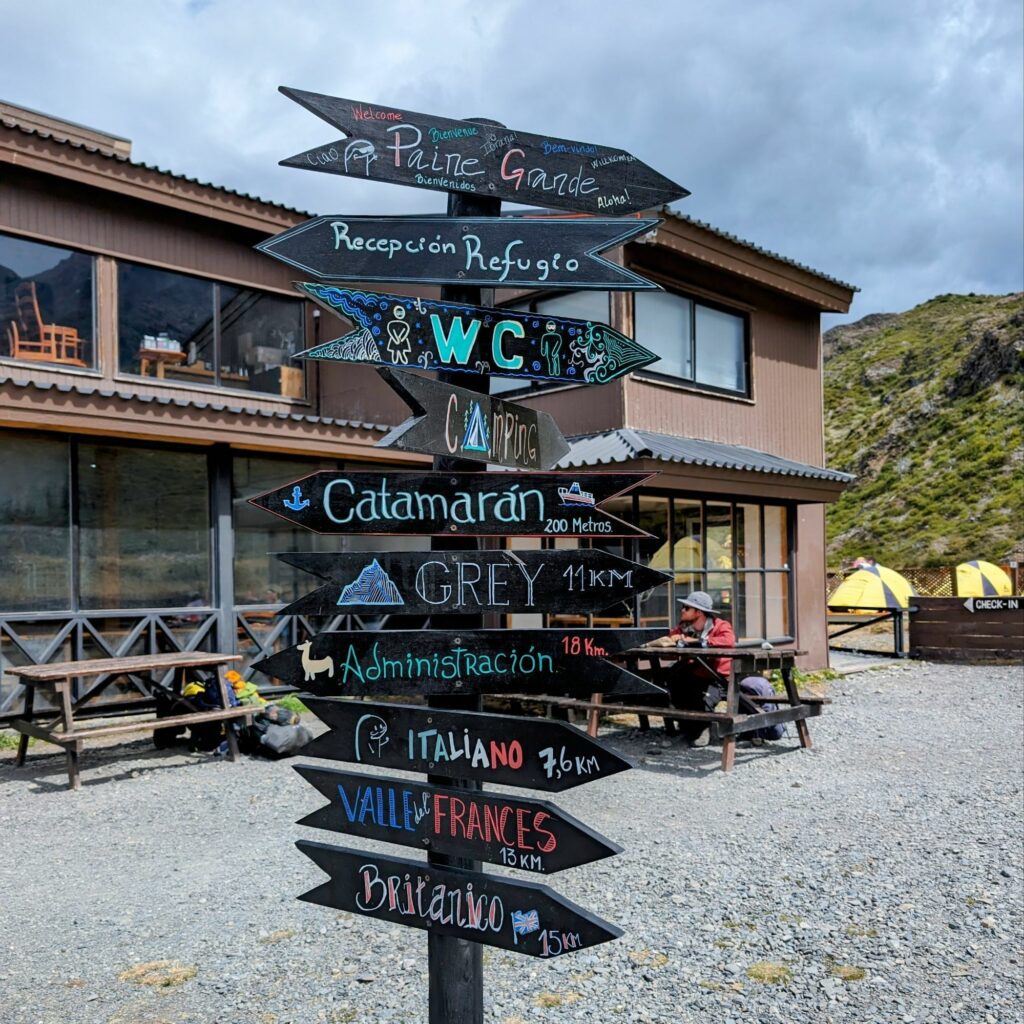
At this point though, you are not done with the hike and you still have to make your way to the Refugio Paine Grande, which is another 2-2.5 hours away. With your backpacks, you will continue to trek to the refugio through a relatively easy and flat trail and make it to the appropriate check in location for the refugio or for camping. You will then receive your allocated time for dinner and breakfast and your lodging assignment.
The Experience at Refugio Paine Grande
Refugio Paine Grande has bunk rooms, tents, and camping site options. The tents are not as luxurious as the previous two refugio locations but they still provide the tent, mattress pad, and sleeping bag. The check in for both camping options is separate from the one for the bunk rooms at the refugio. Similarly to the other refugios, you will check in, receive your allocated time for dinner and breakfast, and be given your lodge assignment. The sooner you arrive at the refugio, the earlier dining time you will receive (for both dinner and breakfast which will determine the time at which you will start your hike for the Torres del Paine W Trek the following day.)
This refugio feels like a ski lodge, with fireplaces and stoves throughout with intimate places to sit and relax. Most of the rooms have 2 sets of bunk beds. The bathrooms and showers are shared for the entire floor. To save energy, electricity and hot water are turned off between 12:00 AM and 6:00 AM, so make sure to shower and charge your devices strategically.
Dinner at this refugio is served in a cafeteria/buffet style, allowing you to fill your plates with vegetables, carbs, proteins, and, of course, dessert. You can also purchase drinks (alcoholic and non-alcoholic) in the dining area. They also have a separate bar area where you can hang out with many of the hikers you may have met during the prior days of the hike.
For people who are cooking their own food, there is a designated structure within the camping area to do this.
Torres Del Paine W Trek: Day 4
Breakfast at this refugio, while cafeteria style, still includes the same items as the other refugios, including toast, eggs, ham, cheese, cereal, coffee, and juice. Before leaving, pick up your packed lunch if it is included in your meal plan, which was similar to the prior day.
Refugio Paine Grande to Grey Glacier
Distance:
10.9 miles (17.5 kilometers)
Elev. Gain
1,578 ft (481 m)
Time:
6 hours

The route from Refugio Paine Grande to Grey Glacier
This link is for the route includes the round trip from the Paine Grande refugio. You will want to hike past the refugio on this day of the hike.
The majority of this hike is straight-forward. As you make your way to the Refugio Grey, you can stop at a few viewpoints along the way to see a lake and get your first sights of the beautiful Grey Glacier.

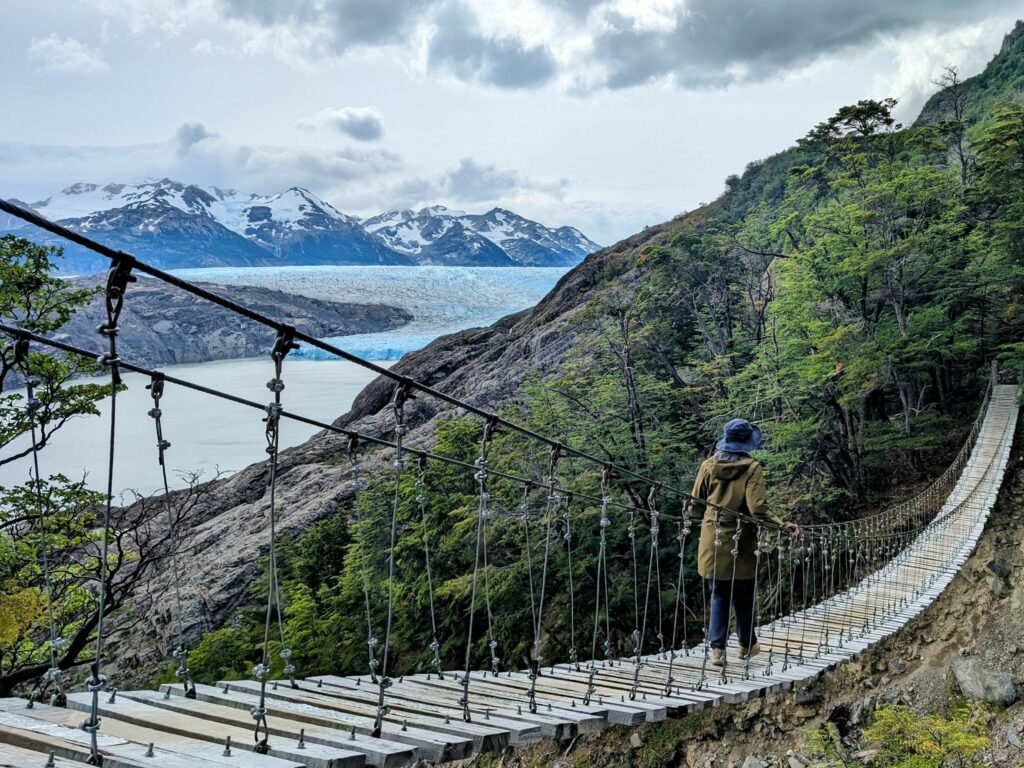
Getting to the Refugio Grey can take around 4 hours, and while you can stop hiking altogether at the refugio, there are a few other viewpoints beyond the lodge that are worth checking out to get closer to the glacier ahead. When you arrive at the Refugio Grey, you can stop to eat lunch and potentially check into the refugio, or just leave your bags within the refugio to continue on to see the various viewpoints. These include the Mirador Grey Glacier and the three different suspension bridges that each bring you closer and closer to the glacier.
Then, make your way back to the refugio to check in. to get your allocated time for dinner and breakfast and your lodging assignment.
The Experience at Refugio Grey
Refugio Grey has bunk rooms, tents, and camping site options. The tents are not as luxurious as the first two refugio locations but they still provide the tent, mattress pad, and sleeping bag. Similarly to the other refugios, you will check in, receive your allocated time for dinner and breakfast, and be given your lodge assignment. The sooner you arrive at the refugio, the earlier dining time you will receive (for both dinner and breakfast which will determine the time at which you will start your hike for the Torres del Paine W Trek the following day.)
Most of the rooms have 2 sets of bunk beds. The bathrooms and showers are shared for the entire floor. To save energy, electricity and hot water were turned off between 12:00 AM and 6:00 AM, so you will have to shower and charge your devices strategically. Dinner at this refugio is also cafeteria/buffet style, allowing you to fill our plates with vegetables, carbs, proteins, and, of course, dessert. You can also purchase drinks (alcoholic and non-alcoholic) in the dining area which is a fun place to celebrate your last night with fellow hikers.
For people who are cooking their own food, there is a designated structure within the camping area to do this.
Torres Del Paine W Trek: Day 5
Breakfast at this refugio, is also cafeteria style, including toast, eggs, ham, cheese, cereal, coffee, and juice. Before leaving, make sure to pick up your packed lunch, which was similar to the prior day.
Refugio Grey back to Paine Grande and Puerto Natales
Distance:
6.8 miles (11 kilometers)
Elev. Gain
984 ft (300 m)
Time:
3 hours, 45 minutes

The route from Refugio Paine Grande to Grey Glacier
This link is for the route includes the round trip from the Paine Grande refugio.
The final hike of the Torres del Paine W Trek is significantly shorter than those on the other days and you can determine how long it will take you based on the amount of time it took you the previous day. Based on the departure time of your bus (and as a result the necessary catamaran) to go back to Puerto Natales, will determine the time at which you need to leave the refugio in the morning

We recommend taking a later bus and catamaran so you can take your time during the day to make your way back to Paine Grande.
The hike back to the Refugio Paine Grande is the same as the one from the day prior. When you arrived at the Paine Grande refugio, you can eat your lunch and relax with the friends you have made while waiting for the boat. If you would like you can also take advantage of the showers in the camping area so that you can refresh yourself and change into fresh clothes. Throughout the hike you can save a fresh shirt and pair of pants to hang out in the evenings at the refugio, meaning that they will be mostly clean after the full Torres del Paine W Trek is over.
Heading Back to Puerto Natales
The catamaran will arrive at the dock of Paine Grande and all the hikers will get on based on the time they have reserved in advance. As you ride on the lake, you can look back at the mountains you had just hiked through. It’s a nice retrospective to see the hike that you will have just accomplished and on a clear day will make for breaktaking views.
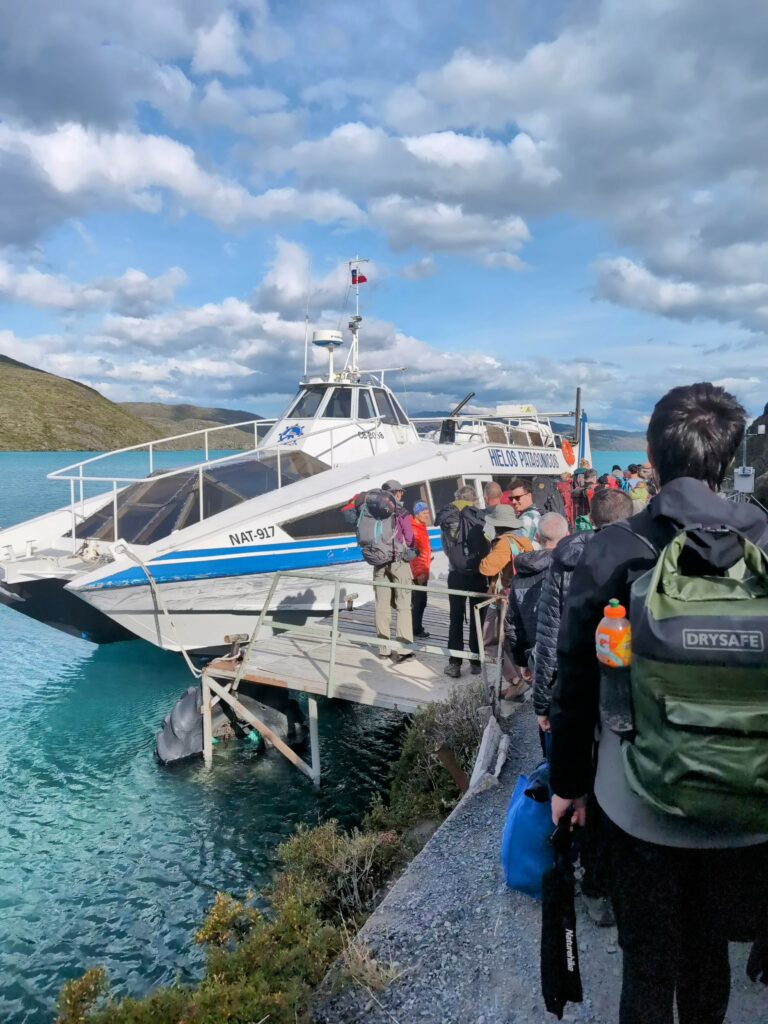
On the other side of the lake, your bus will be waiting for you to go to Puerto Natales. If the catamaran fills up and does not have enough space, do not worry! They will send another boat to pick you up and the buses will wait for that second one before leaving.